Monthly Archives: August 2009

Apple and pear crisp

IMG_4218

Not that I would know, but sometimes you just feel snotty. Either your head is so congested that you just want to be deep under the covers or you feel disheartened that you haven’t found your dream job yet … snotty is as snotty does.

One of the reasons I watch so much Food Network is because it calms me. Watching people prepare beautiful dishes is nearly as comforting as doing the cooking myself. That’s why I love the soothing voices of Ina Garten and Giada over the too-harsh Emeril or Rachael Ray (I prefer the Rachael Ray magazine).

I recently watched the Barefoot Contessa make a yummy-looking apple-pear crisp and I thought, ‘Perhaps that’s just what the doctor ordered,’ if I had health insurance and could afford to visit the Dr.

It was nummy. The combo of apples and pears with spices will make your house smell like fall. The added citrus zests really give it a gourmet flavor, too. And that crust? Well, the secret’s in the crust, my friends!

Here’s how to make it…

2 lbs. firm pears, such as bosc, peeled, cored and cut into chunks

2 lbs. apples, such as gala, peeled, cored and cut into chunks

1 tsp. orange zest

2 T fresh orange juice

1 tsp. lemon zest

2 T fresh lemon juice

1/2 c. sugar

1/4 c. flour

1 tsp. cinnamon

1/2 tsp. nutmeg

Preheat oven to 350. Mix the above ingredients together in a bowl and pour into a baking dish.

For the crust, note: Her recipe made way too much crust and because I don’t have a KitchenAid, I did most of it in a food processor. So this is my interpretation:

Combine in food processor 1 c. flour, 1/2 c. sugar, 1/2 c. brown sugar, 1/2 tsp. kosher salt, 2 sticks of cold butter in cubes. Process until the butter is in small pieces. Transfer to a larger bowl and mix in 1/2 c. oats with a wooden spoon (or do this in the FP if you have enough room). Sprinkle this over the apple-pear mixture.

Put the dish on a baking sheet and bake until golden and bubbly, about 1 hr.

Serve steaming with vanilla bean ice cream over the top.

Jesse loves the addition of the pears with the apples (I usually make plain apple crisps), and I am just a huge fan of the crust. Enjoy, friends, as summer leaves us for fall!

What makes a crisp a crisp

What makes a crisp a crisp

Jalapeno-cheddar cornbread

IMG_4119

Whenever I think of cornbread, I think of that “Arrested Development” episode with the corn-baller fryer that keeps burning people and when they couldn’t sell it in the U.S., they started selling it on Mexican infomercials.

This cornbread is baked safely in your oven, not deep-fried, but it still has spice that anyone will appreciate.

All you do is buy cornmeal and follow the cornbread directions on the back. Why not? Once you’ve mixed the wet ingredients with the dry ingredients, stir in:

1 seeded jalapeno pepper, minced

4 green onions, chopped

3/4 c. shredded cheddar cheese

Sprinkle the last 1/4 c. of cheese over the top of the cornbread and bake it according to the instructions, adding at least 10 more minutes to account for all the cheese in there (at least, mine took an extra 10 minutes). It should be moist but not mushy in the thickest part. As soon as you cut the bread open, you’ll know if you cooked it long enough! And it won’t hurt to go back in for a few minutes, if you need it.

I served this cornbread with Hoppin’ John,  which I’ve made many times, but this time used fresh ingredients in place of canned – I have all this farmers market food to use up!

I used 1 minced jalapeno instead of the canned green chilies, 2 chopped heirloom tomatoes in place of the canned diced, and chicken stock instead of water (increase the water to 1 c. to account for the fresh tomatoes).

We were very pleased with this comforting and satisfying meal. (And yes, that is a big piece of butter oozing out of my slice in the picture. Butter is a must.)

Good luck having only one serving, friends!

Crazy chocolate ice cream

IMG_4112

The first time I had a Mexican mocha was in college.  It was at a little coffee shop called Tony’s, next to the Harris Street Cafe in Fairhaven, Bellingham. I loved the spicy flavors mingling with the chocolate. It gave you an extra kick with your morning joe.

This ice cream is like a frozen Mexican mocha. Rich, almost like chocolate pudding, and spiced with cinnamon and just a hint of cayenne pepper.

Thank goodness I followed the directions (a random site I found online) to not overdo the cayenne. When you make the custard, it won’t taste that spicy. But something happens when you freeze it – now the spice hits you at the back of the tongue and continues down the throat. It’s an odd sensation – creamy, cold cream with that peppery kick. Unlike any other.

I recommend this recipe for anyone with a weakness for chocolate and a desire to be brave in the kitchen. As with all ice creams, making it takes a lot of steps, which can seem like a pain in the ass. But much of the work happens in the fridge or freezer, so it’s not like you are glued to your stove.

Ingredients:

1 c. heavy cream

1 c. whole milk

1 c. skim milk

2 oz. bittersweet chocolate, chopped

1/2 c. unsweetened cocoa powder

1 vanilla bean, split with the seeds scraped out and set aside

2 eggs

1 c. sugar

1/8 tsp. salt

1 tsp. cinnamon

1/8 tsp. cayenne pepper

Heat milks in a saucepan over medium heat and whisk in chocolate until melted. Slowly whisk in cocoa powder until combined. Add vanilla bean and seeds, bring to a simmer, remove from heat, cover and let sit for 30 minutes.

Remove the vanilla bean and reheat over medium-low. In a medium bowl, whisk eggs, sugar and salt. Temper the egg mixture with a cup of the hot chocolate, then whisk all the egg mixture into the saucepan.

Cook the entire mixture over mexium low, stirring constantly, around 10 min. It will look thick and shiny. It is done when it coats the back of a spoon in a thick sheath, or gets to 170 degrees.

In a large bowl that you can fit in your fridge, combine the cinnamon and cayenne. Resist the urge to add more cayenne! Strain the chocolate mixture into the large bowl and whisk to get rid of any clumps. Place a piece of plastic wrap against the top of the liqiud to avoid a skin forming and chill it in your fridge for at least 4 hours, or overnight.

Once chilled, pour the custard into your prepared ice cream maker and freeze per the manufacturer’s instructions. Transfer to a freezer-safe container and let the ice cream finish firming up.

IMG_4114

This would be delicious with some whipped cream, or along with some vanilla ice cream for a contrast. Enjoy, friends, if you dare!

Farmers markets, pork tenderloin and fried green tomatoes

Soon to be fried (heirloom) green tomatoes

Soon to be fried (heirloom) green tomatoes

There is no excuse for Southern cuisine to be so heavy on the deep-fried or processed (pimento cheese ball, anyone?). With such rich soil and a growing season that won’t quit, local farmers markets are bursting with plump tomatoes, crisp green okra (or purple), tender peaches and heavy watermelons. We finally traveled to the state-run farmers market, down in the Triad. It was like a state fair farmers market – four big buildings bustling with vendors. I’ve seen nothing like it in the Northwest (it puts Seattle to shame).

Needless to say, we went a little tomato-crazy. I’ve never seen so many tomatoes in my life! The heirloom variety, from deep purple to striped yellow to rainbow, cost only $1 per pound at the Winston-Salem farmers market (our first stop). And green tomatoes – those that I never, ever find in the NW – were five for $1. We didn’t resist.

I did, however, resist the temptation to buy some beautiful potted plants at the Triad farmers market. The gardenias smelled like heaven and the fig trees would have looked perfect on my patio – and they even had tiny figs growing on them! $15 for a fig tree? That’s like a grocery expense! But alas…

We now have this fruit bowl to work with while we look for more tomato recipes (Jesse already made his salsa)…

IMG_4094

I did buy the remaining ingredients for tonight’s dinner: chili-rubbed pork tenderloin with mango relish. It’s from – you guessed it – Cook’s Illustrated “Cooking for Two.” I love the idea of rubbing the inexpensive pork tenderloin with chili powder and natural cocoa powder, searing it and then roasting it in the oven. The sear/roast method is my favorite way to cook pork. The recipe turned out a pretty perfect tenderloin, and the mango relish was spicy and the perfect accompaniment to the pork (pork loves sweet things).

Jesse said this is the best pork dish he’s had in a long time. I’ll post the recipe and then get on to the fried green tomatoes…

Ingredients:

1 pork tenderloin, about 12 oz.

2 tps. chili powder

1/2 tsp. cocoa powder

table salt

1 tsp. vegetable oil

1 mango, peeled, pitted and chopped into small chunks

2 T chopped cilantro

1 T lime juice

1 shallot, minced

1 tsp. minced jalapeno, seeded, about 1/2 a jalapeno

Preheat oven to 425. Pat pork dry. In a small bowl, combine chili powder, cocoa and 1/4 tsp. salt, then rub it all over the pork.

Heat oil in ovensafe skillet over medium-high heat until smoking. Brown tenderloin on all sides, reducing heat if the spices start to burn. This will take about 6 min. total and the pork will look almost black. Transfer the skillet to the oven and roast until the internal temp. is 140 degrees, about 15 min.

Once done, tent the pork with foil for another 10 min and it will be perfect.

Meanwhile, make the relish: combine the mango, cilantro, lime, shallot, jalapeno and 1/8 tsp. salt in a bowl. Once you’ve sliced the pork, spoon over the relish. The juices will mingle with the pork for a wonderfully complex flavor. The pork will be so tender, you can cut it with your fork!

IMG_4106

Now, for the reason you’re all here: fried green tomatoes. I used the recipe form Simply Recipes.

All you do is slice the tomatoes thick (but not too thick, or they won’t be softened enough when you cook them – no more than 1/2 an inch). Season them with S&P and let them sit 15 min. Then, heat 1/4 c. EVOO in a nonstick skillet over medium heat. Get 4 bowls ready: 1/2 c. milk, 1 c. flour, 2 eggs lightly beaten, 1 c. bread crumbs (or corn meal). Dip each slice sequentially: milk, flour, egg, and finally crumbs. Then, put them in the oil and brown on both sides. Transfer to paper towels to drain. When all are done, sprinkle them with a little more salt, to taste.

IMG_4102

Now, I was going to make a chipotle aioli to go with these, because that’s how I’ve seen it in the restaurants. But it really didn’t need it. The tomatoes were juicy enough on their own, and who needs the extra fat? These were really delicious, even if I did slice mine a little too thick. What a wonderful Southern invention. Perhaps serve yours with some hot sauce on the side.

Enjoy, friends!

Simple olive-oil cake

IMG_4059

When I first heard that such a thing as olive-oil cake existed, my reaction was, “Huh.” It sounded slightly interesting, but not enough for me to start combing the Interwebs for recipes.

Then I read “Julie/Julia” and I promised myself that I would cook my way through my Bon Appetit magazine, which has Julia Child-esque difficulty levels, but with a healthier and non-French bend. The point is to cook things you wouldn’t normally bother with. So I made this cake, which Bon Appetit modeled after a treat served at some cafe in Manhattan.

The men in my house exclaimed that they loved it. I thought it was okay, definitely a tasty snack or breakfast nibble. It actually reminds me of something related to banana or cucumber bread, but maybe that’s just because I cooked it in a loaf pan? It’s a little more dense than your typical cake, and the orange zest gives it a nice aroma. The olive oil adds a little something that you can’t put your finger on. It also colors the cake a pretty yellow.

Ingredients:

1 1/2 c. flour

1 c. sugar

1/2 tsp baking soda

1/2 tsp baking powder

1/4 tsp kosher salt

2 large eggs

3/4 c whole milk

1/2 c olive oil

2 tsp orange zest

Preheat oven to 325. Oil and flour a 9-inch loaf pan. Whisk first 5 ingredients in a large bowl.

In another bowl, whisk eggs, milk, olive oil and orange zest to blend. Gradually whisk this into the flour mixture. Scrape into your loaf pan.

Bake about 60-65 minutes (mine took less) or until a tester inserted in the center of the cake comes out clean. Cool in pan, on rack, for 20 minutes, then cool completely on rack.

This would do well with a little orange or lemon chutney. Or even some whipped cream. Enjoy, friends!

If it exists, fry it

IMG_4016

Whooee! We just got back from an exciting week with 13 family members in a beach house near Myrtle Beach, South Carolina. It was beautiful – sunsets, palm trees, sand that feels like flour and lots and lots of good food. We cooked in and ate out and we never went to bed hungry (or sober).

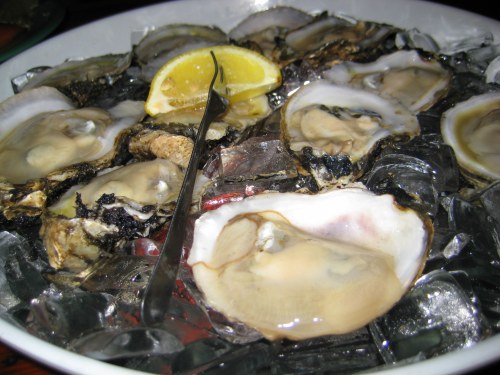
Our first night, we ate at the Inlet Crab House, which specializes in fresh seafood caught off the Atlantic Coast and then fried. We ordered the oyster shooters to start, of course:

IMG_4017

Feeling festive, both Jesse and I ordered the softshell crab for our entrees:

IMG_4018

Mine came in a sandwich, with a side of coleslaw and Southern green beans (read: overcooked). It was tasty, but once I cut it open and saw all the yellow guts inside the crab, it didn’t have the same appeal that it used to. I think my Spider Roll ordering days are over.

IMG_4019A couple nights later, we dined at a fabulously upscale restaurant, where each plate had no less than one pound of seafood. I ordered the “grill plate,” which included grilled shrimp and scallops and a baked potato. The shrimp were seasoned well, smoky and sweet and spicy, and I loved the clarified butter for dipping. At that point, this was my favorite dish of the week. A-mazing.

IMG_4022

We had a cookout later in the week, which included a trip to the fish market for 3 pounds of fresh shrimp. We took them home and boiled them with “shrimp oil,” which is actually a seasoning packet, and lemon. Then, we had to hand-peel and de-vein them.

IMG_4027

These later turned into Jesse’s dad’s avocado stuffed with shrimp and mango-chili salsa, which is just as delicious as it sounds.

IMG_4030

With that, we had Merissa’s fabulous chicken and sausage gumbo, which took her like 30 hours to prepare. I’m not going to post the recipe yet, because I want to try it myself first. Good thing I don’t have a day job!

IMG_4029

She also made some perfect cornbread to go with it, and a honey butter to smear all over it.

IMG_4028

Colleen made a yummy Smitten Kitchen dish later that week: an ice-box “cake,” which tasted like a giant Oreo cookie. She baked these chocolate cookies (basically home-made Oreos), then layered them with hand-whipped cream and sliced strawberries.

IMG_4045

Then, you let it sit for a few hours, so the cookies can absorb the juices and become soft, like cake. Surprisingly good.

The last night, I was so overwhelmed with good food that I didn’t take any pictures – Blast! But here’s what we had: oyster shooters, She Crab Soup (a Carolina favorite), shrimp with grits cakes in a yummy bacon-gravy (this was my favorite thing of the night) and my entree was a pasta with fresh clams, white white and garlic. Yum! We drank a lot, laughed a lot and splurged. It was the perfect ending.

While on vacation, I read “Julie and Julia,” which I have a few opinions about. (As my co-worker said, “I’m just mad that I didn’t think of that first!”) The food stuff was good, but I could do without the rest of the whiny drama. It definitely inspired me to “cook dangerously.” So I picked up my new Bon Appetit magazine and turned down the pages of these recipes that would normally seem too gourmet for me. Like de-boning a chicken for an Italian roast chicken with fresh herbs and lemon. I’ll blog it as soon as I can make it!

Enjoy the week, friends!